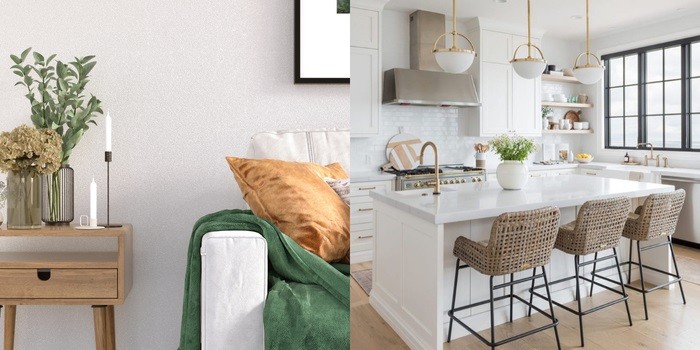
Crafting your own DIY home sweet home sign adds a personal touch to your space. This creative project allows you to express your style and warmth.
Home is where memories are made, and a custom sign can enhance that feeling. Whether you want a rustic farmhouse look or a modern design, the possibilities are endless. Creating your own sign allows for personalization that store-bought options can’t match.
You can choose colors, fonts, and materials that reflect your personality. This DIY project is not only enjoyable but also budget-friendly. Gather your supplies, unleash your creativity, and transform simple materials into a beautiful piece of art. Your sign will become a cherished part of your home decor, showcasing your unique taste.
Choosing Your Theme And Design
Creating a DIY Home Sweet Home sign begins with your theme and design. This step sets the tone for your project. Consider what speaks to you. Your sign should reflect your style and personality.
Selecting A Style
Styles vary widely. Choose one that resonates with you. Here are some popular styles to consider:
- Rustic: Use weathered wood and earthy tones.
- Modern: Focus on clean lines and minimalistic designs.
- Vintage: Incorporate retro fonts and antique finishes.
- Whimsical: Play with bright colors and fun shapes.
Think about your home decor. Match the sign style to your existing theme. This will create a cohesive look.
Incorporating Personal Touches
Make your sign unique. Personal touches add charm. Here are some ideas:
- Add Your Family Name: Personalize with your last name.
- Include a Quote: Use a favorite saying or mantra.
- Use Special Colors: Choose colors that represent your family.
- Incorporate Symbols: Add icons like hearts or home images.
Think about materials too. Consider using reclaimed wood or canvas. These add character and history.
Your DIY Home Sweet Home sign should tell your story. Personal touches make it special. Share your unique style with everyone who enters.
Materials You’ll Need
Creating your own Home Sweet Home sign requires some essential materials. Gather the right tools and supplies to craft a beautiful piece. This guide helps you choose everything you need for your DIY project.
Basic Tools
- Measuring Tape: For precise measurements.
- Wood Saw: To cut your wood to size.
- Sandpaper: For smoothing edges and surfaces.
- Drill: For making holes, if needed.
- Paintbrushes: To apply paint and finishes.
- Clamps: To hold pieces together while working.
Choosing The Right Wood
Pick wood that fits your style and budget. Here are some good options:
| Type of Wood | Properties | Best Use |
|---|---|---|
| Pine | Lightweight and easy to work with | Indoor signs |
| Birch | Strong and smooth finish | Outdoor signs |
| Plywood | Durable and versatile | Large signs |
Paints And Finishes
Selecting the right paints and finishes can enhance your sign’s look. Consider these options:
- Acrylic Paint: Dries quickly and comes in many colors.
- Stain: Adds color while showing wood grain.
- Sealer: Protects against moisture and wear.
Use a combination of paints and finishes. This will give your sign a unique touch. Enjoy the crafting process and let your creativity shine!
Preparation Steps
Creating your own DIY Home Sweet Home Sign is exciting. Proper preparation makes the process easier. Follow these simple steps to get started.
Sanding And Priming
Sanding and priming are essential for a smooth finish. Start with these steps:
- Gather your materials:
- Sandpaper (medium and fine grit)
- Primer paint
- Clean cloth
- Sand the surface of your wood. Use medium grit sandpaper first.
- Switch to fine grit sandpaper for a smooth finish.
- Wipe off dust with a clean cloth.
- Apply a coat of primer paint. Let it dry completely.
Measuring And Cutting
Measuring and cutting accurately ensures your sign looks great. Follow these steps:
- Decide on the size of your sign.
- Use a measuring tape to mark dimensions on the wood.
- Mark cutting lines clearly with a pencil.
- Use a saw to cut the wood along the marked lines.
Check the edges. They should be smooth and straight. Your sign is now ready for painting and decoration.
Crafting Techniques
Creating your own DIY Home Sweet Home signs is fun. Different techniques can enhance your design. Each method adds unique charm. Choose what suits your style best.
Stenciling Basics
Stenciling offers precision and creativity. Here are some basic steps:
- Choose a design or create your own.
- Print the stencil on thick paper.
- Cut out the letters or shapes carefully.
- Secure the stencil on your board using tape.
- Use a sponge or brush to apply paint.
Try these tips for better results:
- Use a light hand to avoid paint bleed.
- Choose contrasting colors for visibility.
- Practice on scrap material first.
Hand-painting Tips
Hand-painting allows for personal touches. Here are some tips to guide you:
- Select quality paint suitable for wood.
- Use fine brushes for detail work.
- Mix colors to create your own shades.
Follow this simple approach:
- Sketch your design lightly with a pencil.
- Start painting from the center outwards.
- Layer colors for depth and texture.
- Allow each layer to dry before adding more.
Adding Decorative Elements
Enhance your sign with decorative elements. Consider these ideas:
| Element | Description |
|---|---|
| Ribbons | Add color and texture to your sign. |
| Stickers | Easy way to add fun designs. |
| Natural Elements | Use twigs or flowers for a rustic look. |
Choose elements that match your theme. Secure them using glue or nails. Layer elements for a three-dimensional effect.
Finishing Touches
After crafting your DIY Home Sweet Home sign, the last steps are crucial. These finishing touches enhance the look and longevity of your piece. Focus on sealing, protecting, and hanging your sign properly.
Sealing And Protecting
Sealing your sign keeps it safe from damage. Use a protective finish to ensure durability. Here are some popular sealing options:
| Sealer Type | Best For |
|---|---|
| Polyurethane | Indoor Signs |
| Outdoor Varnish | Outdoor Signs |
| Mod Podge | Decoupage Projects |
Apply sealer in thin coats. Use a brush or spray. Let each coat dry fully. Sand lightly between coats for a smooth finish.
Mounting And Hanging
Mounting and hanging your sign properly is essential. Choose the right method based on your wall type. Here are some popular options:
- Picture Hanging Strips
- Nails or Screws
- Command Hooks
Follow these simple steps for mounting:
- Select the spot on the wall.
- Measure and mark where the sign will go.
- Install your chosen mounting method.
- Hang the sign carefully.
Your DIY Home Sweet Home sign is now ready to shine. Enjoy your unique piece of art!
Inspiration And Ideas
Creating a DIY home sweet home sign can be a fun project. It allows you to express your personality. Use your creativity to design a custom piece. Gather ideas from various themes and occasions. Let’s explore some inspiration to get you started!
Gallery Of Examples
Check out these unique DIY home sweet home signs:
- Rustic Wooden Signs: Use reclaimed wood for a vintage look.
- Chalkboard Signs: Paint a board with chalk paint for versatility.
- Floral Accents: Add flowers or greenery for a fresh touch.
- Light-Up Signs: Incorporate fairy lights for a warm glow.
- Family Names: Personalize with your family name for a special touch.
Themes And Occasions
Choose a theme that reflects your style or occasion:
| Theme | Occasion |
|---|---|
| Farmhouse | Housewarming |
| Beachy | Summer Parties |
| Modern | Weddings |
| Vintage | Anniversaries |
| Seasonal | Holiday Celebrations |
Mix and match themes for a unique design. Each piece tells a story. Let your creativity shine through your custom sign!
Frequently Asked Questions
What Materials Do I Need For Diy Signs?
You’ll need wood, paint, stencils, brushes, and a sealant for durability.
How Can I Personalize My Home Sign?
Use family names, quotes, or favorite colors to make it unique to your style.
What Techniques Can I Use For Painting?
Consider techniques like stenciling, sponging, or brush lettering to create different effects.
Where Can I Display My Diy Sign?
Place your sign in the entryway, living room, or garden for maximum visibility.
How Long Does It Take To Make A Sign?
Creating a sign typically takes 2 to 4 hours, depending on complexity and drying time.
Can I Use Recycled Materials For Signs?
Yes, reclaimed wood and other materials add character and sustainability to your project.
Conclusion
Creating your own DIY home sweet home sign is both fun and rewarding. It adds a personal touch to your space. Choose materials and designs that reflect your style. With a few simple steps, you can craft a unique piece that welcomes everyone.
Start your project today and enjoy the satisfaction of handmade decor!


